Learn HTML5. Global Structure
|
HTML documents are strictly organized. Every part of the document is differentiated, declared and enclosed in specific tags. In this tutorial we are going to see how to build the global structure of an HTML document and the new semantic elements incorporated in HTML5. |
Doctype
First, we need to indicate the type of document we are creating. In HTML5 this is extremely simple:
<!DOCTYPE html>
This line must be the first line of your file, without any space or line before. This is a way to activate the standard mode and force browsers to interpret HTML5 when it's possible or ignore it otherwise.
<html>
After declaring the type of document, we have to build the HTML tree structure. As always, the
root element for this tree is the <html> element. This element will enclose all our HTML code.
<!DOCTYPE html>
<html lang="en">
</html>
The attribute lang in the opening tag <html> is the only attribute we need to specify in HTML5. This attribute defines the human language of the content of the document we are creating—in this case, en for English.
HTML5 is extremely flexible regarding the structure and the elements used to build it. The <html> element may be included without any attributes or even ignored at all. For compatibility, and for a few more reasons not worth mentioning here, we recommend you follow some basic rules. We are going to teach you how to build HTML documents according to what we consider best practices.
<head>
Let's continue building our template. The HTML code inserted between the <html> tags has to be divided into two main sections. As it happened in previous HTML versions, the first section is the head and the second the body. So the next step is to create these two sections in the code using the already known elements <head> and <body>.
The <head> goes first, of course, and like the rest of the structural elements, it has an opening and a closing tag.
<!DOCTYPE html>
<html lang="en">
<head>
</head>
</html>
The tag itself didn't change from previous versions, and its purpose will be exactly the same. Within the <head> tags we will define the title of our web page, declared the character encoding, provide general information about the document, and incorporate external files with styles, scripts or even images needed to render the page. Except for the title and some icons, the rest of the information incorporated to the document between the <head> tags is usually not visible.
<body>
The next big section that is part of the main organization of an HTML document is the body. The body is the visible part of the document and is specified with the <body> tag.
This tag didn't change from previous versions of HTML:
<!DOCTYPE html>
<html lang="en">
<head>
</head>
<body>
</body>
</html>
<meta>
Now it is time to build the document's head. There are a few changes and innovations inside the head, and one of them is the tag that defines the character encoding of the document. This is a meta tag and it specifies how the text has to be presented on the screen.
<!DOCTYPE html>
<html lang="en">
<head>
<meta charset="utf-8">
</head>
<body>
</body>
</html>
The innovation for this element in HTML5, like in most cases, was just simplification. The new meta tag for the character encoding is shorter and simpler. Of course you can change utf-8 for the encoding you prefer to use, and other meta tags like description or keywords may be added, as shown in the next example:
<!DOCTYPE html>
<html lang="en">
<head>
<meta charset="utf-8">
<meta name="description" content="This is an HTML5 example">
<meta name="keywords" content="HTML5">
</head>
<body>
</body>
</html>
Note: Aside from the title or some icons, most of the information inserted between the <head> tags is not visible to users. The <meta> tag specifies its type and content declares its value, but none of these values are shown on the screen.
In HTML5, it is not necessary to self-close tags with a slash at the end, but we recommend selfenclosing
for compatibility reasons.
<title>
The <title> tag, as usual, simply specifies the title of the document, and there is nothing new to comment about it.
<!DOCTYPE html>
<html lang="en">
<head>
<meta charset="utf-8">
<meta name="description" content="This is an HTML5 example">
<meta name="keywords" content="HTML5">
<title>title of the document</title>
</head>
<body>
</body>
</html>
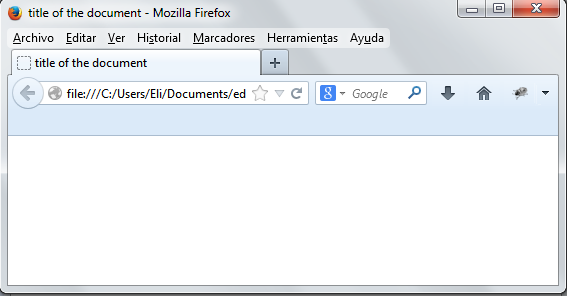
Note: Usually this text is shown by browsers at the top of the window.
<link>
Another important element that goes in the head of the document is <link>. This element is used to incorporate styles, scripts, images or icons from external files within a document. One of the most common uses of <link> is to incorporate styles inserting an external CSS file:
<!DOCTYPE html>
<html lang="en">
<head>
<meta charset="utf-8">
<meta name="description" content="This is an HTML5 example">
<meta name="keywords" content="HTML5">
<title>This text is the title of the document</title>
<link rel="stylesheet" href="edu4javastyles.css">
</head>
<body>
</body>
</html>
In HTML5, it is no longer necessary to specify what kind of style sheet we are inserting, therefore the type attribute was eliminated. We only need two attributes to incorporate our styles' file: rel and href. The attribute rel means relation and this is about the relation between the document and the file we are incorporating. In this case the attribute rel has the value stylesheet that tells the browser that the file edu4javastyles.css is a CSS file with styles required to render the page.
Note: A style sheet is a group of formatting rules that will help us change the appearance of our document—for example, the size and color of the text. Without these rules, the text and any other element will be shown on the screen using standard styles provided by browsers (default sizes, colors, etc.).
The result of our code at this point would be;

| << Learn HTML5. Introduction | HTML5-Body Structure >> |


